
Section 3
Create your ad account
The ad account is where your campaigns, budgets, and billing live. Setting it up directly inside Business Settings keeps everything organized and ready for partner delegation.
business.facebook.com/settings
- 1
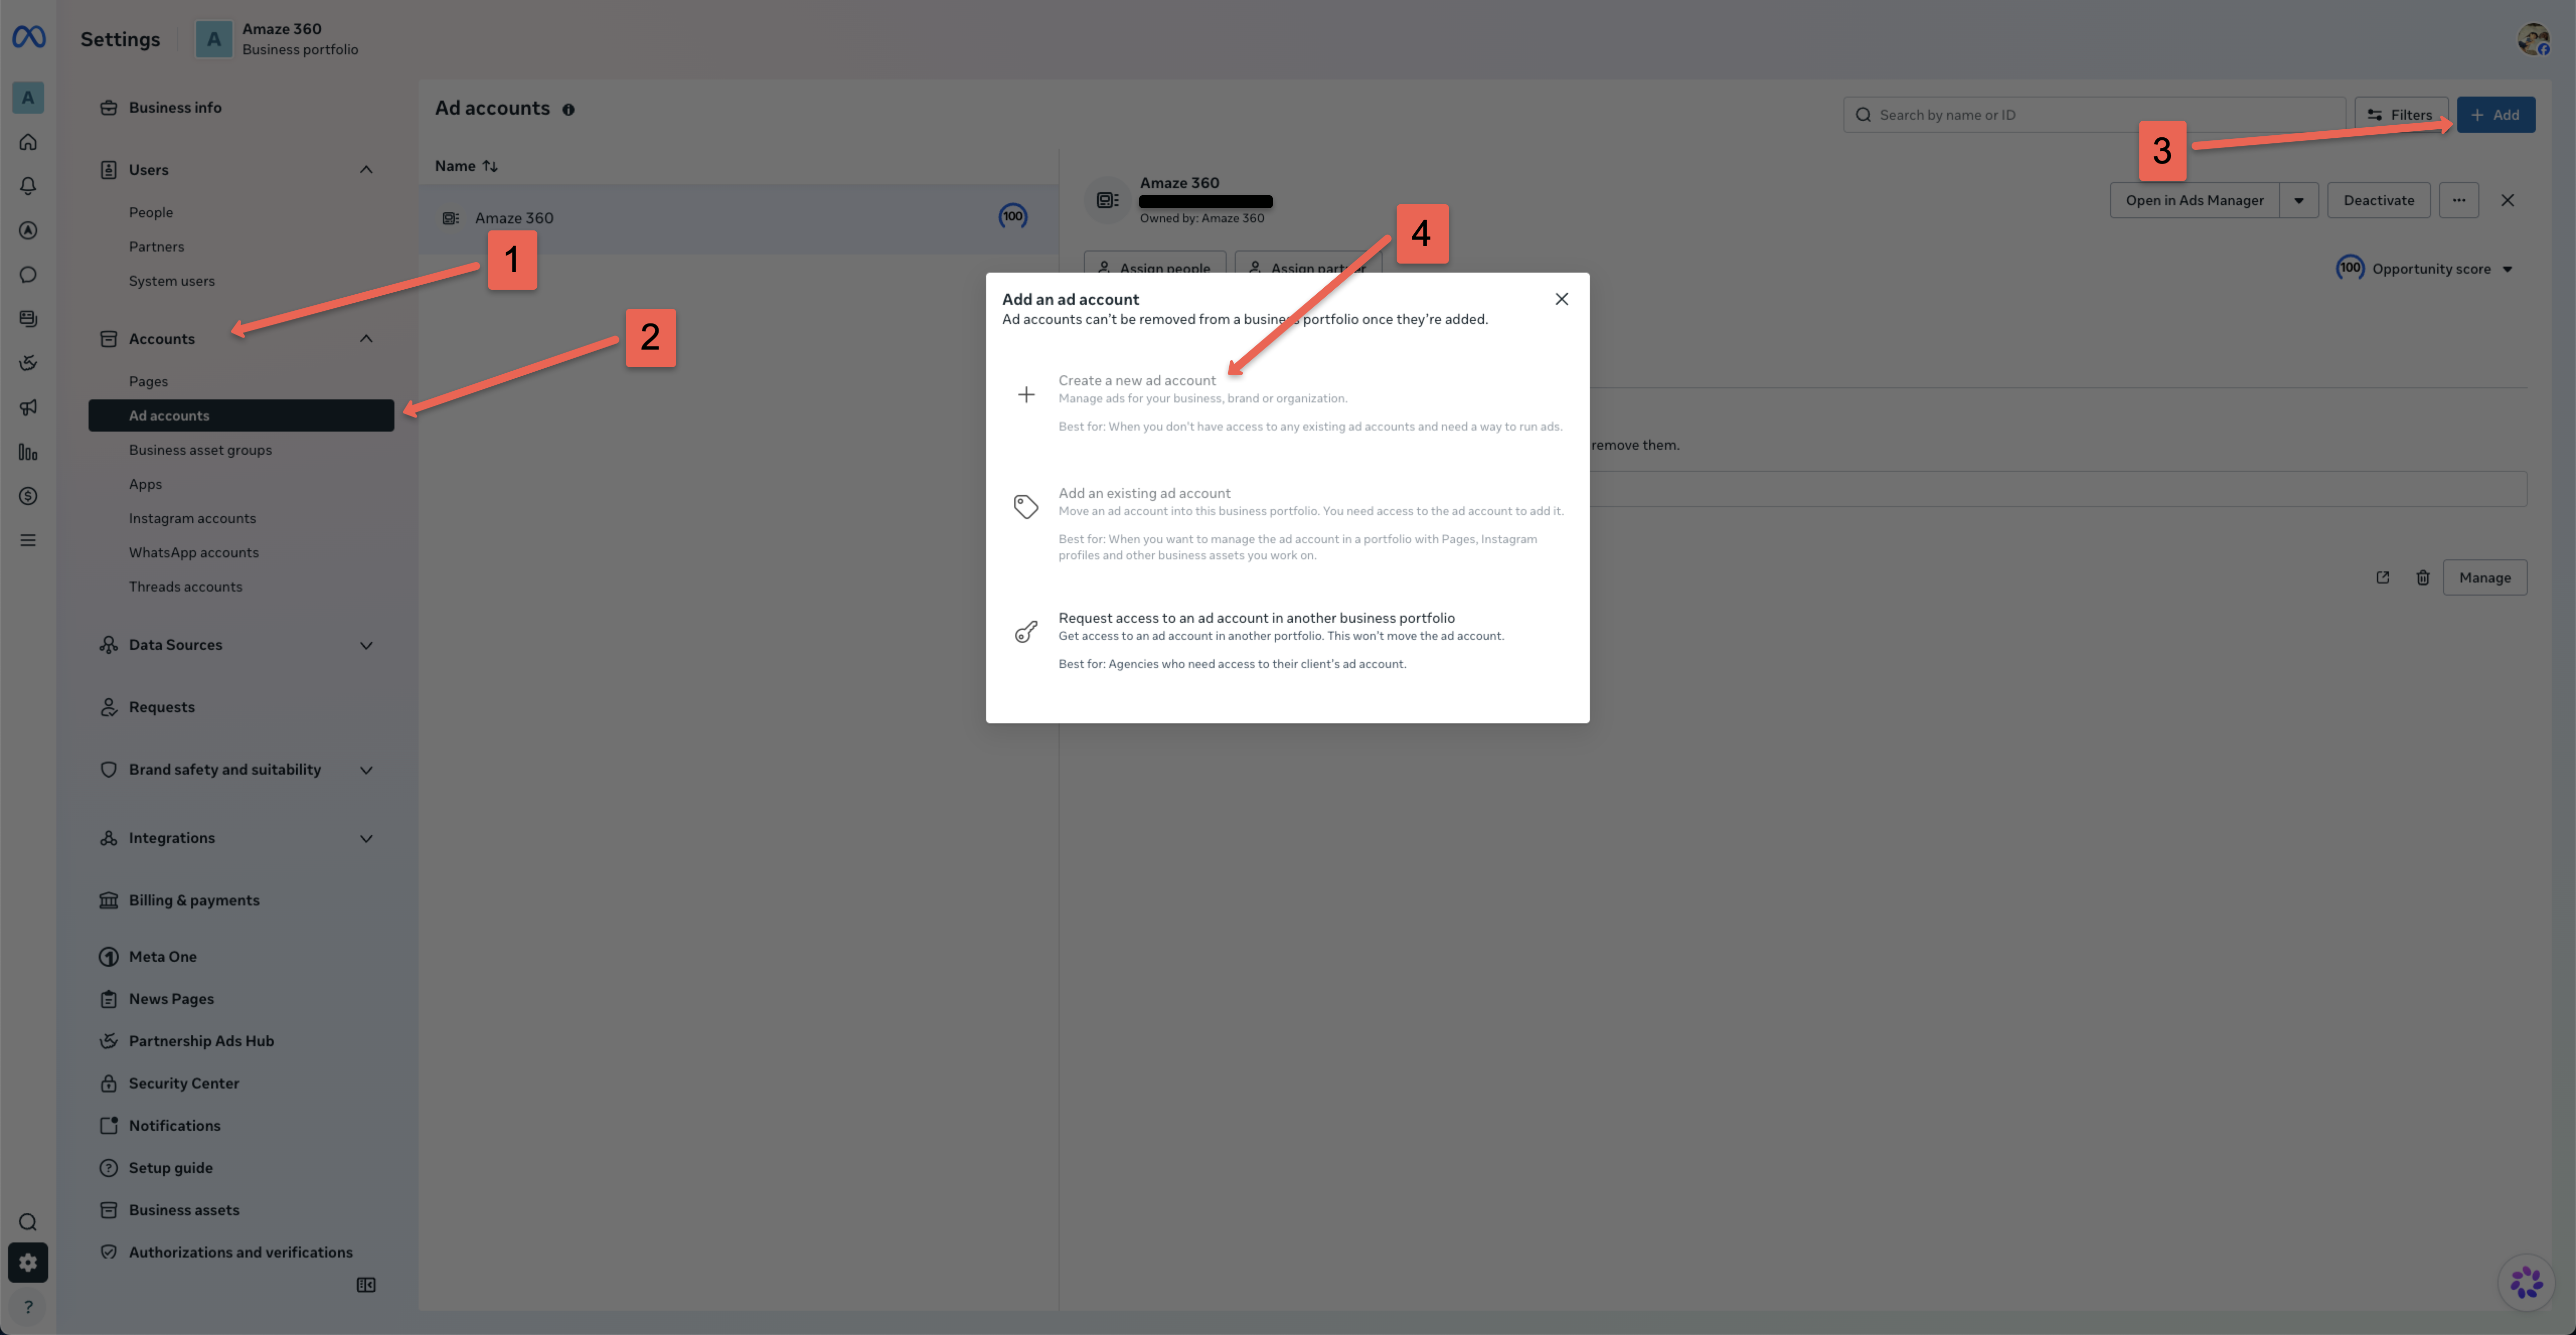
Click “Accounts” (1) in the left sidebar menu
From your Meta Business Settings screen, look at the left-hand navigation panel and locate the “Accounts” group. - 2
Select “Ad accounts” (2)
Click “Ad accounts” under the Accounts dropdown to open your portfolio's ad accounts management area. - 3
Click the blue “+ Add” button (3) in the top-right
In the top-right corner of the ad accounts panel (next to Filters), click the blue “+ Add” button to open the action dialog. - 4
Choose “Create a new ad account” (4)
From the options in the modal, click “Create a new ad account” (Manage ads for your business, brand or organization). Note: Do not select 'Request access' — you want to own this account directly. - 5
Enter Account Name, Time Zone & Currency
In the prompt that follows, type a clear name for your ad account (e.g. “[Your Brand Name] — Primary”). Set your local time zone and billing currency. Important: Time zone and currency cannot easily be changed once created. - 6
Select “My business” & Assign Yourself Admin Access
When asked who this ad account will be used for, choose “My business”. On the next step, toggle on “Full control (manage ad account)” for your own profile so you remain the primary owner. - 7
Add payment info (or do it right before launch)
You can click “Add Payment Info” right away to attach your business credit card or PayPal, or leave it for later before we publish your first ad campaign.